# Guide
# Environments
# Managing Multiple Environments
By default, Theme Packer will use the .env file in your project root and pass any keys prefixed with SHOPIFY_ to @shopify/themekit (opens new window). You can however pass an --env=[env] flag to the cli, which will then use environment variables from an associated .env.[env] file. For example:
theme-packer deploy --env="dev"
will use the environment variables defined in your .env.dev file.
TIP
You can deploy to multiple environments at once by passing multiple --env flags to the deploy command. For example:
theme-packer deploy --env="uk" --env="us" --env="eu"
This will skip run one initial build before deploying to each environment.
It's common practice to keep multiple env files for various reasons. For example you might require dev, staging and production environments through your development lifecycle. Or, if you deploy to multiple stores in various regions you might keep region-specific environments, like uk, us and eu.
# Using config.yml
If you prefer to manage your environments in a .yml file much like how ThemeKit does, you can simply provide a SHOPIFY_CONFIG key in your .env file, for example:
SHOPIFY_CONFIG=config.yml
This tells Theme Packer to use config.yml instead of an environment file. Please note however that when passing environment flags to match environments set up inside your config, you will need to use the -e shorthand flag, instead of --env.
# Ignoring Files
Much like how you might have a .gitignore in your repository to avoid committing your node_modules directory, you may find that there are theme files you need to avoid uploading to Shopify. For example, it's common to ignore the settings_data.json file to avoid overwriting all of the theme settings that have changed in the customiser.
ThemeKit provides two options for ignoring file updates: managing your ignore list per-environment, or managing your ignorelist in a separate file. You are fine to do either, using either SHOPIFY_IGNORE_FILES in your .env files to manage them on an environment level, or using SHOPIFY_IGNORES in your .env file to manage them in a separate folder. The standard boilerplate for a Theme Packer project uses an ignorefile by default, called .themekitignore, and this file is tracked in Git. The reason for this is that it's safer when working in teams to share an ignore file rather than manually keeping individual .env files in sync.
# Section Schemas
We often need schema options to be shared across multiple sections. We might for example need a predefined set of colours available to style some sections. Theme Packer allows you to write your section schemas separately as JavaScript modules and import them with a custom tag. To do so add a schema tag in the following format: {% schema '[import]' %}, where [import] is the name of the schema module in your /src/schemas directory. You can read more about it here: Liquid Schema Plugin (opens new window).
Input: section.js
module.exports = {
    name: 'Section',
    settings: [
        //...
    ],
    blocks: [
        //...
    ],
};
Input: section.liquid
{%- render 'section-component' -%}

{% schema 'section' %}
Output: section.liquid
{%- render 'section-component' -%}

{% schema %}
{
    "name": "Section",
    "settings": [],
    "blocks": []
}
{% endschema %}
# Always Use External URLs
Sometimes you might be forced to work on your theme via a live url, such as a .myshopify.com url. In such cases if you may need to enable assets.always-external-urls in your theme-packer.config.js.
module.exports = {
    'assets.always-external-urls': true,
};
This will ensure that every JS and CSS tag generated by Theme Packer points to the external BrowserSync URL, rather than your localhost address.
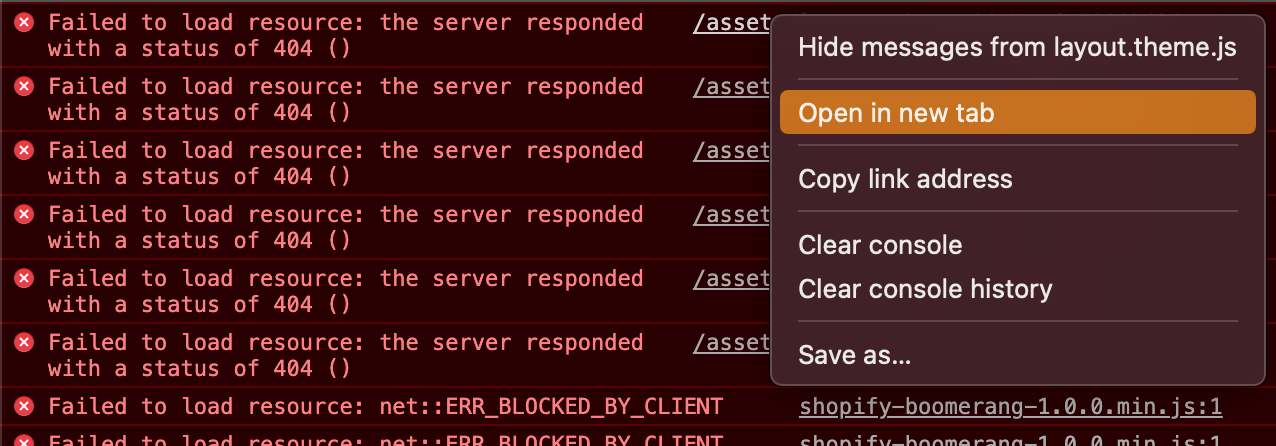
After launching Theme Packer with this enabled, if you find that they're not loading, open the console in your browser, right click the url for one of the assets and click "Open in new tab", or your browsers equivalent.
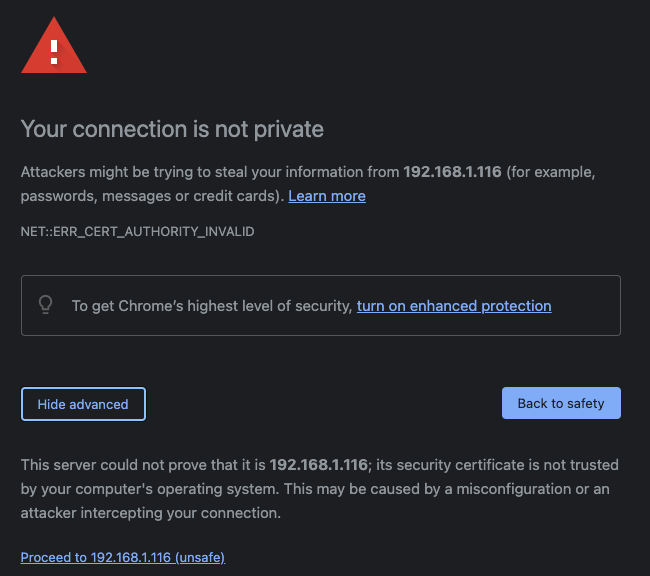
You will should then find your browser presents a warning page. Click the "Advanced" button, followed by the "Proceed to [URL]" link. Now you should find that the assets will load for you.
You may have to follow these steps again periodically, which used to cause a lot of confusion amongst users of Slate, which is why assets.always-external-urls is not enabled by default.
# Passing flags to ThemeKit
Theme Packer supports all command flags for the deploy (opens new window) and watch (opens new window) commands in Theme Kit. Simply pass the flags to your command.
theme-packer deploy --allow-live
TIP
The --allenvs flag should not work with .env files. If you wish to use that flag, either use a config.yml, or just add multiple --env flags to your script.